Showing posts with label wedding. Show all posts

Tuesday, December 22, 2015

our wedding guestbook


One of my favorite details of my wedding was our wedding guest book. I actually had originally created a book on Shutterfly using our engagement photos one weekend, but when I came back to it a few days later, I just wasn't happy with the way it was turning out.

I realized that I wanted to go a less traditional route than the typical "book," and so after some brainstorming (with the help of Pinterest, of course) I came up with the idea to use a print and have the guests sign the matte around it.

It was harder than I thought to figure out what print that I wanted to use. I decided to go with Rifle Paper Co., since they make the cutest custom designs, and it matched my aesthetic almost perfectly. Rifle Paper Co. also featured in my wedding planning early on - they designed the cards that I gave my bridesmaids!

I went with the Custom Floral Art Print in peach & rose, which complimented the wedding colors so well. For awhile I was leaning toward the Custom Floral Heart Art Print, but after seeing this pin, realized that the former would be a better fit for the wedding.
Rifle Paper Co. was a dream to work with. After placing my order, they contacted me within days to create custom drawings of Matt and myself. I was far enough along in the wedding planning process that I already had Matt's suit and my dress, and so I was able to send them photos of us wearing our wedding garments. But, I think they would have done a fine job if we had just sent them photos of ourselves along with what we were planning on wearing! I even took care to describe my hair the way I wanted to wear it on the day of the wedding - when I say I'm detail oriented, I mean it!

After sending over our description, they were quick with drafting up a proof of our design. I think it was within the week, if not sooner. There was just one small change which they fixed immediately, and then it was off to the printer.

One of the cool things about Rifle Paper Co. that saved me time was the fact that I could order my print already framed and matted, which I definitely took advantage of. It arrived in beautiful condition, and they even included a little notecard of our print that I have stored in my wedding memory box. :)

The print now hangs in our wedding gallery wall, and I just love it!

Photos by Emily March Photography

Wednesday, July 22, 2015

Our Wedding: the morning of

spent my wedding eve with two of my bridesmaids at my parent's house. It was a very low-key night, though one of the smoke detectors kept chirping for new batteries, which delayed our sleep a bit! 

That morning, I woke up pretty early, I think around 6, ready to start my day! My wedding day didn't officially start until noon, when we were arriving at the venue for hair and make-up. Let me tell you, that morning seemed to go on forever! I had a quiet breakfast with my parents, and then the girls started waking up. 

a fitting coffee mug from Ashley Brooke Designs, if I do say so!

Side note: I drank SO MUCH fluid on my wedding day, because I was a bit nervous that I was going to faint during the ceremony - I had already almost fainted at two bridal fittings, and have a penchant for fainting in the past, so was determined to make sure that I kept my blood sugar level up for the wedding day!

We hung out until around 11 or so, and then headed to the venue. My cousin had beaten us there, and sent a photo of the ceremony chairs being set up. It was starting to get very real!


Once we were all there, the girls at Body Bliss and Spa immediately got to work on hair and make-up. Sarah, the owner, had given me a timeline in advance of when each girl was getting their hair and make-up done throughout the day, which helped my nerves tremendously. Since I was getting married at 4:30 and wasn't arriving to the venue until 12, I was a bit nervous that Sarah and her team wouldn't have everyone done on time, which included me, five bridesmaids, and two mothers.

I needn't have worried, though, because they were done with plenty of time to spare. It's such fun getting your hair and make-up done, and the girls did such a great job. I even wore false eyelashes for the occasion!

The bridal party got ready upstairs in the main house of the venue, while the guys got ready in an old cabin on the property. Since Matt and the groomsmen were in such close proximity, I was confined to the upstairs, and caught glimpses of the ceremony and reception through small windows that afforded a view of the goings-on. At one point, I was standing on the toilet, craning my neck to look out the window at the reception pavilion!

After a quick lunch of wraps and chips, we popped a champagne bottle (or two) to celebrate!

Emily and her assistant Morgan arrived shortly thereafter, and I gave them a bag that I had already set aside with all of the "details" that Emily might want to photograph - invitation, welcome bag, perfume, shoes, etc.


During the rehearsal the day before before, I had given the girls robes from Plum Pretty Sugar, with the intent that we could get ready in them. It made for such adorable photos!


At this point, I was starting to get a bit antsy, so when Emily said to me, "let's put your dress on, girl" I was about ready to burst from excitement!


Since my dress had so many layers, I needed a lot of help from my bridesmaids!


One very special gift from one of my sister-in-laws was my "something blue," an embroidery of my married initials with my wedding date, which I had sewn into my dress. It was such a sweet and thoughtful detail.

Once my gown was on, with my gorgeous bouquet in hand, us girls went outside for some portrait shots before the wedding.

To be continued!

Photographer: Emily March Photography / Day-of-Coordinator: Ashlee Adams of The Sutherland / Hair and Make-Up Artist: Body Bliss Salon and Spa / Invitations: Ply / Bride's Dress: "8724" by Justin Alexander / Bride's Shoes: "Couture Bow Pump" by Valentino from Nordstrom / Bride's Hair Comb: "Bella" by Hair Comes the Bride / Bridesmaid Dresses: J Crew

Friday, July 17, 2015

Bridal Accessories

One of my favorite wedding accessories was my hair comb. I decided to not go with a traditional veil for a couple of reasons:

1) To help with the budget, I decided that this was one of the items that I could forego
2) When I tried on veils with my dress, it seemed "off" somehow, almost as if the veil was competing with the dress. I think it's because there is so much tulle in the gown itself that a gauzy veil just looks superfluous 
3) Matt wasn't too keen on me wearing a veil, and so I wanted to respect his wishes

Since I wasn't going to wear a veil, I did need a little something extra to go with my dress, because I wasn't wearing any jewelry, either. I had planned on wearing this kate spade bracelet, but when I tried it on with the dress, it just didn't look right.


That's when I got the idea of wear a pretty hair comb! I found one at the cleverly named Hair Comes the Bride, and was so happy with the piece. It looked so elegant in my hair, that I don't think anyone even realized that I wasn't wearing a veil!

Wednesday, July 15, 2015

My wedding dress

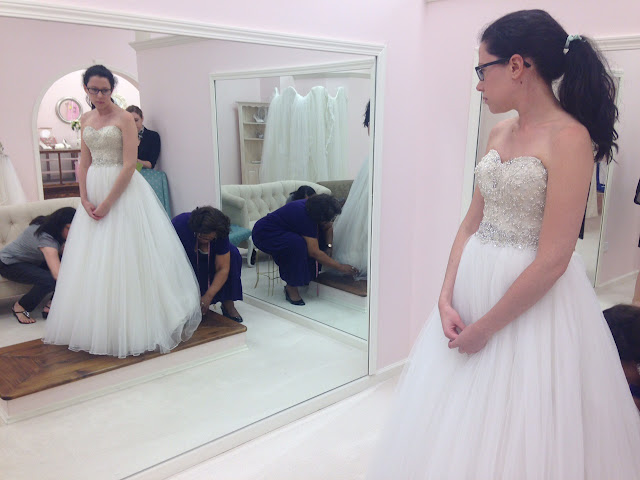
I've blogged about my wedding dress hunt before, but now I can finally show you some photos of the actual dress!

I ordered my dress in February, and at the end of July I got a happy call that my dress had arrived! Truthfully, I was a bit nervous that the dress wouldn't fit. When I ordered my gown in February, I decided to go a size down, since I was between two sizes, and thought that a smaller size would mean less alterations (and less money). I was very happy that it fit perfectly.


I did decide to get a crinoline layer taken out of the skirt, since it was a little too "Southern Belle" for me. I am from the North, after all! The hem of course needed raising, which the seamstress did little by little, over the course of four bridal fittings.


We did have a bit of a problem with the bustle. Originally, the seamstress made a 9-point bustle, but when the sales girl, the seamstress, my mom, and the maid of honor couldn't seem to find the buttons and line up the points correctly, the seamstress decided to make it a bit easier by only doing 3 points, which I was very grateful for. I kept envisioning everyone at the reception waiting, as the clock ticked on, and my bustle still not pinned!


One thing that I don't think I mentioned in my first post regarding my wedding dress was the fact that I didn't have an immediate emotional reaction to my dress. I liked it, sure, but I didn't have a "moment" or anything.

With that said, one of the telling ways that I knew that the dress was for me was the fact that after I tried on a few gowns, I wanted to put the dress back on. And when I had it on, I didn't want to take it off! And as the wedding planning progressed, and I had my hair and make-up trial, I wanted to put the dress back on, to see everything together! I would say that all of these things were a good indication that while I may not have gotten emotional, I picked the right dress for me.

Tuesday, July 14, 2015

Our wedding invitations

Well hello! It's been awhile since I last updated my blog...four months to be exact! A lot has happened since then, but perhaps the biggest thing is that I got married! I kind of left you all hanging with my last post about my March goals, but I am back now to chronicle my wedding.

The good thing about taking such a long break is that now I can share everything all at once, since my wedding day has come and gone, as sad as that is. It was a truly beautiful day, on all accounts - spiritually, emotionally, and physically. I am excited to share it with you!

Today, let's talk invitations!

I had no clear direction on what I wanted our wedding invitations to look like, I just knew that I didn't want them to look plain. While I can appreciate a classic invite, I kept being drawn to invitations that had a little something extra - a pop of color, a cute monogram, or a fun envelope liner. The wedding invitations are most likely the first thing that your guests will see regarding your wedding, and so I wanted to set the right tone and feel with our invitations.

After some careful consideration, I started working with Molly Gaither from Ply to design my invitations. Molly was truly a gem to work with, and I wholeheartedly recommend her, for the following reasons:

1) She is so sweet, and was just as excited about my invitations as I was
2) She was sensitive to our budget, and never made me feel like I was "skimping" on a design decision. Case in point - I really wanted letterpress invites, but when the budget just simply wouldn't allow it, Molly pointed out that with a digital print, I could personalize my design and add as much color as I wanted - which was exactly what I was going for
3) She clearly loves what she does, and was incredibly patient during the design process
4) Lastly, she took my inspiration and created a beautiful invitation suite that looks better than what I had envisioned. It can't get any better than that!

After I decided to work with Molly, she went right to work creating a design. I shared a Pinterest board of my wedding invitation inspirations, and  we were off!

I can't remember how many rounds we went through - I think it was about 6, but once we got through the basic structure, it was essentially small tweaks until I declared them perfect, and that was mostly changing the color scheme of the different elements of the suite.

And here is the finished product!


The gold glitter envelope liner was an extra addition that I felt would really make the whole suite "pop," and I think it had the desired effect! Molly hand-cut all of the envelope liners, so it was nice touch. 

The envelopes were addressed by Calligraphy by Carrie, who also did the escort cards and cupcake flavor cards, but more on that later. I have atrocious handwriting (I blame the fact that I am a lefty!), and so it was important to me to have a beautiful addressed envelope for our guests.

What do you all think? I truly loved them, and I hope you do too!

Thursday, February 26, 2015

wedding planning update: 3 months to go!


Since my last update…
— We received our invitations, which are stunning! You can see a sneak peek of the envelopes on my Instagram
— I finished the bridesmaid gifts!
— Purchased some monogrammed Jack Rogers for the honeymoon
— Speaking of the honeymoon, we booked our car rental – Mustang convertible or equivalent :)
— Scheduled my hair and make-up trial
— Decided on ceremony readings
— The guy’s attire is figured out and purchased!
— Purchased custom cocktail napkins – I’m really excited about these!
— Purchased my rehearsal dinner dress
   Wedding cake design is finalized, and the cake topper is purchased, though we still need to decide to cake flavors
   Purchased table number signage
   Purchased the postage for the invitations
   Matt purchased the groomsmen gifts
Next up on the list?
— We have a wine tasting at our venue this week, so I’ll pick the wine and champagne choices then
— Need to iron out the transportation details
— Continue compiling ceremony and reception details (guest book, centerpieces, signs, etc.)
— Get invitations to calligrapher to address
   Start working on escort cards – this will probably be my one and only DIY project, so we’ll see how it goes

Monday, February 23, 2015

our save the dates

Happy Monday, friends! It feels good to be back on a normal schedule. Last week North Carolina got some snow and ice along with freezing temperatures, which forced me to work from home for the week. By Friday I was going a bit stir crazy! 

I did get my invitation suite last week (!), but today let's talk about save the dates!
I decided to send our save the dates very early, since most of the guest list is from out of town. We sent them in July – yep, ten months out from our wedding date! This may seem a bit too early, but I wanted to give people plenty of time to start saving for those costly plane tickets, wedding presents, outfits, etc. Weddings are expensive for the guests too!
We decided to go with Minted for our save the date design. I’m not sure where I first heard about Minted, but they are a great resource for all kinds of invitations, save the dates, holiday cards, business cards, birth announcements, you name it. Their products come for independent designers, but they are affordable and good quality. I would have gotten my invitations from them (more on that in a later post), but I just couldn’t decide on a suite.
Minted also has save the date magnets, which I knew for sure that we wanted to do. And I’m glad that we did – we have gotten so many compliments on the fact that our save the date is a magnet; who knew this would have such an impact on people?!
We wound up going with the “Love Stories” style. We loved the fact that it has multiple pictures (what better way to show off our engagement pictures!) and that it almost looks like chalkboard writing, which is going to feature prominently in our signage at the wedding.
Here’s the final design that we ended up with!

I had a lot of fun arranging the pictures, and arranging them some more, and arranging them again…you get the idea. :)
I took advantage of Minted’s complimentary guest addressing, and sent these babies out. It was fun hearing the excitement from our friends and family over these. Hopefully everyone will be able to make the trip to North Carolina in May!

Tuesday, February 10, 2015

our engagement photos

Hello, lovely friends! Matt and I had our engagement photos done back in May, but I wanted to share them with you all today. We had a great time shooting with Samantha Floyd (she was so patient, and spent so much time with us) and now, we have these photos to look back on and remember this season of our lives! Here are few of my favorites:

I am very pleased with how they turned out!

We ended up taking our photos around Durham, including Duke University’s campus and library – how could we not, with our engagement story?, the Eno River State Park, and downtown Durham.


Wednesday, February 4, 2015

rehearsal dinner apparel + shoes

Now that I have a wedding dress and shoes, I can legitimately start thinking about a rehearsal dinner dress and shoes! It may be too early to make a decision on this, but if I have an excuse to buy a new dress and shoes, well, I’m going to take it. And the earlier I purchase things like this, the easier it is on my wallet, since I won’t have to buy everything all at once. I will circle back around to wedding day jewelry and hair pretties, but today, we’re going to talk about rehearsal dinner apparel.
First, let’s discuss the dress. I want to wear a white dress, obviously, but I have been having the hardest time finding something that matches my style and doesn't look too bridal. I don’t want to wear something that is too bling-y, because I have a specific shoe in mind, and I don’t want my dress and shoes to “compete” with each other. This has been hard, ya’ll!
I’ve been keeping my eyes peeled for something that fit my criteria, and I believe I may have found it! A couple months ago, I noticed the lovely ladies at Southern Weddings Magazine wearing the cutest dresses that matched my style; in fact, I liked every single dress that the girls had on! I found out that they were made by designer Camilyn Beth, and hopped on over to her website to take a look.
After a lot of indecision over the different designs (this one in particular I kept being drawn to), I’m planning on purchasing the Fresh Air Dress in Ivory. I’m just hoping that it will fit without too much trouble!
(photo from Camilyn Beth)
Now, onto my rehearsal dinner shoes! After purchasing my wedding shoes, a particular pair of cute, sparkly heels kept appearing on my Pinterest feed and in wedding blogs with more frequency, and I would pause briefly on these images, wishing that I could wear that those beautiful shoes on my wedding day, too. But then I thought, why not wear these for the rehearsal dinner? (I may have justified this too easily, but hey).
Of course, these beauties are from kate spade. Aren’t they just lovely? An added bonus – they match the wedding colors, as well!

Tuesday, February 3, 2015

groom attire

I decided early on (much like the bridesmaid dresses), that Matt and his gents will be wearing suits on the big day. Matt doesn’t really care what he will be wearing, so long as it comes with a vest. I think I can make that happen!


We wanted to buy a suit instead of buying/renting a tuxedo for three main reasons:
1) Buying means you can tailor, which means a better fit.
2) It makes sense financially to buy a suit that can be worn again.
3) The specific aesthetic we were going for lends itself to suits instead of tuxedos.
We also decided fairly quickly that the suits would be from J Crew. Matt has a pretty slight build, and most suits tend to make him look like he is playing dress up in his father’s work clothes, if you know what I mean. I love the look of J Crew’s Ludlow suit, and a trip to the store to try on some fancy jackets and pants confirmed my belief that a J Crew suit is the right choice.
However, our timing was off on the season arrivals, and so we've had to wait until four months out from our wedding date to start seriously considering a suit choice, mostly due to the fabric of the suits. (I am not about to let my groom and groomsmen wear a wool suit at the end of May, in North Carolina, at an outdoor wedding!) The spring suits have finally made an appearance, but now I am stumped on the color! For the longest time I envisioned a light gray suit for the gents, but the lovely tan color is catching my eye more and more. I think it would look gorgeous with the soft pink of the bridesmaid dresses.

I emailed a J Crew wedding coordinator for some swatches, but what do you think? Do you like the gray suit or tan suit more? Regardless of the color, I would like the suit to be monogrammed inside the jacket. It will be a great way to remember the day when the suit is worn again! :) 

Monday, February 2, 2015

wedding weekend welcome bag inspiration

I thought I’d share some of the inspiration I’ve been collecting for our wedding weekend welcome bags. I know for sure that I want them to be bags, so that’s why I’m calling them bags as opposed to boxes, sacks, etc. Matt and I have thought a bit about what we’ll put in them, but I’m not going to spill the beans here, in case any readers will be attending the wedding. I don’t want to spoil the surprise! I’ll report back after the wedding weekend, though! In the meantime, here are a few examples that are inspiring me:

I love the simple hand-drawn map that accompanies this welcome bag, including the craft beer, and the little tie-ins to the wedding colors. (photos by Graham Terhune Photography)

A bag like one from Maptote is a great way to incorporate your state or city, and can also serve as an additional favor for your guests after the wedding is over. (photo by Max Wagner)

This wooden box lined with scrapbook paper looks soft and feminine, and pretty easy to DIY. You can find unfinished wooden boxes at Michael’s. Glue in some patterned paper and add a pretty ribbon, and you're all set! This one was designed by SimpleSong for Martha Stewart Weddings and photographed by Kate Headley.

A wire basket is a nice touch for a Southern country wedding, don’t you think? Add a big bow in one of your wedding colors and some carefully curated goodies, and you have an elegant welcome basket. (photo by KT Merry)

I don’t know about you, but I would love to receive an overflowing basket like this one! And that pink peony bouquet? Swoon! (photo by Adam Barnes and Katie Stoops)

A paper bag with sweet and simple touches is great for those on a budget. (photo by Love is a Big Deal)

This one is probably my favorite. I love the personalized bucket (how genius for a beach wedding?), the bicycle motif, and the bright, happy colors. From the very first welcome, this wedding looks like it’s going to be a fun weekend! (photo by Amy Arrington Photography)